When I recently started getting back into Solaris, one of the things I wanted to get working was LDAP authentication, so that I can log into systems with the same set of credentials like in a business environment. As with most Solaris tasks, the information on how to set this up is scarce on the Internet, especially for Solaris 8 and 9.
I already had three LDAP instances set up in my lab environment: a primary instance and two replicas. This post will not cover the setup of these, but all three are AlmaLinux 9 containers running OpenLDAP 2.6. The replicas have been configured to allow non-SSL connections to them, for the purpose of authenticating legacy operating systems such as Solaris. I don’t recommend allowing this in a production environment of course. Perhaps at a later date I will work on configuring Solaris to connect to OpenLDAP via SSL, but even this will require allowing insecure versions of SSL/TLS.
As mentioned in a previous post, I recently purchased a SunBlade 100 workstation off eBay. The first operating system I installed on it was Solaris 8, as this was the only version of Solaris I had CD ISOs for and it only has a CD-ROM drive (later I was able to install Solaris 9 on it over the network). I was disappointed to find out that Solaris 8 didn’t come with OpenSSH preinstalled; it wasn’t until Solaris 9 that SSH was installed with the base OS. I also had an x86 Solaris 8 virtual machine running in VirtualBox that I wanted to be able to access from my Linux systems (installed using the steps here: https://github.com/mac-65/Solaris_8_x86_VM). I decided to try installing OpenSSH on the VM first, as I could take snapshots and revert to a working state if a step failed. Prior to starting these steps, I applied the below patches per mac-65’s guide:
The Solaris 8 x86 recommended patch cluster, found here.
Patch 112439-02, which provides /dev/random and /dev/urandom (needed to generate SSH keys), found here.
I didn’t have to apply any patches to my SunBlade 100.
It’s been nearly four years since I’ve posted anything to this blog. In that span of time, I have learned so many new skills and systems administrator “hacks”, to the point that this blog seems to represent a version of myself several major releases old.
Back when I last posted to this blog, I was still new to Ansible, while still clinging to and believing in the superiority of Puppet. I’ve since warmed to Ansible and now use it for practically all of my configuration management, even having passed the RHCE, which tests primary on one’s Ansible knowledge. Meanwhile, I haven’t written Puppet code in at least three years.
I’ve also recently gained an interest in “retro” server computing, that is Unix and Linux (and possibly some Windows) from the late 90s to the late 2000s. The first job I had where I interacted with *nix systems had a mixture of RedHat Enterprise Linux 5 and Solaris 8/10 systems. Being a 24-year-old who had mostly experimented with Ubuntu and Fedora, I hated working on the Solaris systems, particularly the SunBlade 150 workstation I was given in a broken state and told to fix before I could “graduate” to the Unix support team. After fixing it, I was told to use it as my secondary desktop. I hated it: the ugly gray and purple case, the dated Window 3.1-like CDE UI, and the out-of-date software, having to compile many tools I wanted from source. When I had a chance to inherit a departing coworker’s x86 desktop running RHEL 5 (which I also found dated), I wasted no time in kicking the SB-150 out of my cubicle.
It would probably come as a surprise to my past self, then, that at age 37 I would willingly purchase another SunBlade workstation off eBay, an SB-100 with 50 less Mhz. Why would I willingly subject myself to such pain, when Solaris has become almost a memory? I suppose after a certain period of time, maybe 20 years or so, old and slow becomes cool again, sort of like 80s and 90s cars (well, for some people anyway). For me, getting old stuff to work has always been a delightful and brain-stimulating challenge.
Me connecting two 1994-circa Thinkpads via Laplink in 2001.
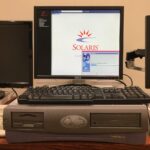
Net-installing Solaris 9 on a SunBlade 100 workstation in 2025.
What I’ve found, however, is that information on how to get things working on Solaris is scarce and scattered througout the Internet, and mostly pertains to Solaris 10 or newer. In this blog I’d like to—attempt to at least—share what I’ve learned. It will probably be of use to very few people, but there is always the chance it might help someone.
In sum: going forward, this blog might contain some posts on new stuff, old stuff, or I may just stop posting to it altogether like I usually do.